Showing posts with label recipes. Show all posts

Friday, September 13, 2013

Easy Sesame Candy

Easy Sesame Candy

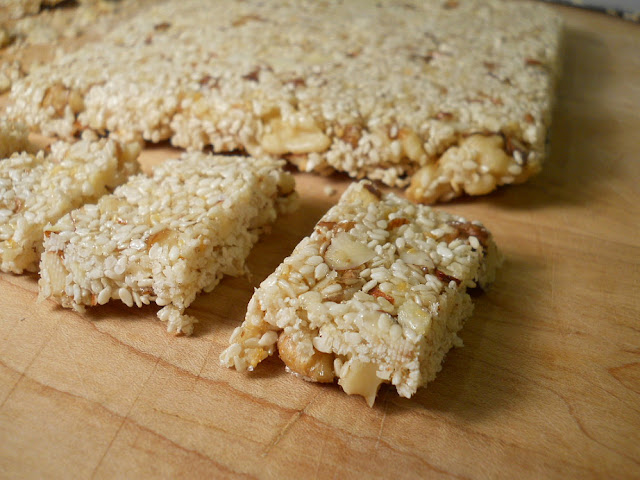
I love Middle Eastern food including the candy. According to second edition of the Food Lover's Companion our friend the sesame seed is the first recorded seasoning in history, dating back to 3000 B.C. Assyria. Assyria, I believe, is modern day (northern) Iraq.  Which would explain why you find packaged sesame candies in Middle Eastern markets. With seeds, nuts and honey this is a pretty nutritious candy, super tasty, and really easy to make. 

A few tips:
1.  This sesame candy will keep for several days if wrapped up or put in an air tight container.

2. Pastelli traditionally uses pistachios but any nut you have on hand will work well in the candy. I honestly don't think I have ever used pistachios they are always too dang expensive when I go to buy them. I usually use almonds and/or walnuts.

3. If you happen to turn your back and accidentally toast the sesame seeds for too long on the first step, simply transfer them to a plate while you melt the sugar with the nuts. Return the seeds to the pan when you add the honey.

4. You can find sesame seeds in Middle Eastern markets, the bulk section of your market or co-op, or in jars in the Asian section of the market.

Easy Sesame Candy

Easy Sesame Candy

Coconut or vegetable oil for the pan
3/4 cup sesame seeds
1/3 cup shelled and roughly chopped nuts, pistachios are traditional
1/4 cup sugar
1/4 cup honey

Directions: 
Lightly oil a wooden spoon and a 9"x6" pan.

Place the sesame seeds and nuts in a nonstick skillet and toast them lightly over low heat just until they start to take on a deeper color. Be careful, low and slow here is the key. The seeds will continue to toast during the next several steps so you don't want to over do it on the first step. (See tip 3 above if you over do it.)

Add the sugar to the seeds and nuts in the skillet. Cook over low heat until the sugar melts and takes on a slight golden color. Don't stir, just give the pan a few shakes.

Add the honey to the skillet. Quickly stir the honey into the sesame seeds and nuts. Mix until the candy becomes sticky and thick. Scrape the mixture into the oiled pan and flatten it with the back of an oiled wooden spoon.

Let the candy cool for just a few minutes, turn it out onto a cutting board, and cut into small rectangles. Don't wait too long or it will be too hard to cut and you won't be able to have the cute little rectangles of candy and feel fancy and continental.

Friday, September 6, 2013

Simple Roasted Salsa Verde

Simple Roasted Salsa Verde

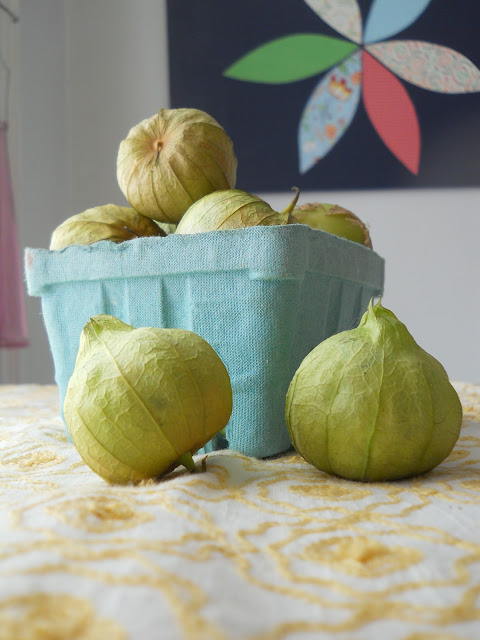
I could not resist these tomatillos at the farmer's market last Saturday. They piqued my interest because of their color and texture and the fact that I rarely buy them. I like to rotate the produce I prepare in order to both try new recipes and get a variety of nutrients and vitamins. This salsa verde has a smoky/earthy/tangy flavor. It is a nice alternative to red tomato-based salsas.

A few tips:
1. Remember to remove all of the seeds from the jalapenos if you want the salsa less spicy. Leave all, or some, of them in for a more spicy salsa.

2. This salsa freezes very well. Save time and money by freezing half if you are cooking for one or double the recipe and then freeze half if cooking for a family.


Simple Roasted Salsa Verde

Simple Roasted Salsa Verde - Makes about 3 cups

1 1/2 - 2 lbs fresh tomatillos, husks removed
2-3 jalapeno peppers, halved (seeded for a less spicy salsa)

3 whole garlic cloves, peeled
2 T olive oil
1/2 cup chopped onion
1 T fresh lime juice
1 cup chopped fresh cilantro
1 tsp black pepper to taste
salt to taste (optional)

Directions:
Preheat oven to 425 degrees F.
Rinse tomatillos to remove the stickiness you'll find under the husks.
Place tomatillos on a rimmed sheet pan with the pepper halves and garlic cloves.
Roast for about 30 minutes until the tomatillos and pepper skins start to have black spots.
Remove the blackened skin from the peppers and transfer with tomatillos and any juices from the pan to a blender of food processor.
Pulse until chunky.
Add onion, lime juice, cilantro and puree until smooth. 

Add pepper and salt to taste.

This simple salsa verde is delicious on chicken or shrimp tacos and quesadillas. Enjoy!


Sunday, August 25, 2013

Late Summer Blueberry Muffins

Late Summer Blueberry Muffins

I love the farmer's market in August! Fresh garden tomatoes, sweet corn, and berries, berries, berries. I loaded up this weekend in an attempt to make the most of what's left of the summer. I even froze some of my blueberries for the first time. It worked beautifully and now I can enjoy fresh blueberries next month also.

I want to share this recipe for blueberry muffins that my mother has been making for as long as I can remember. It was probably originally from a 1960's ladies magazine. I have made this recipe with whole wheat flour and did not enjoy them. I now use white whole wheat flour or all purpose flour. I also use almond milk, but have used soy milk and skim milk to good results.

A few tips:
1. Be sure to stir very very gently. If you have a tendency to mix over-enthusiastically, be sure to just fold the ingredients together until all the flour is off the bottom of the bowl and you don’t have any big pockets of flour in your batter.

2. Gently toss the blueberries in flour before you add them to the batter. This will keep them all from falling to the bottom of the muffins.

Late Summer Blueberry Muffins

Blueberry Muffin Recipe - Makes 12

1 3/4 C sifted all-purpose flour
1/4 C sugar
2 1/2 tsp baking powder
3/4 tsp salt
1 well-beaten egg
3/4 C milk (whole, skim, soy, or almond)
1/3 C canola oil
1 C fresh blueberries

Directions
Preheat oven to 400 degrees.
Sift together flour, sugar, baking powder, & salt.
Combine egg, milk & oil.
Make a well in the center of the dry ingredients and add egg mixture.
Stir gently just until dry ingredients are moistened.
Gently stir in blueberries.
Fill greased or papered muffin tins 2/3 full.
Sprinkle with cinnamon sugar (optional)
Bake for 25 minutes or until tops are golden brown.
Tip muffins to one side while cooling to prevent steaming crusts.

These beauties are a great addition to a BBQ chicken, corn-on-the-cob, and potato salad dinner. Yum! They also freeze well. Enjoy!